unRAID on Thecus N5550 with 6 drives

Thecus N5550 6th Drive Mod

This post is specific to owners of the Thecus N5550 but will apply to almost all of the Thecus NAS lineup as well. Anyone with Thecus NAS devices knows that the operating system “ThecusOS” has been practically abandoned. The vendor came out with “OS7” but it never fully finished and development died somewhere along the way. It also did not fully support the N5550 and many other models. Owners were left with unsupported devices.

This was fine with me for a while since I never really used the management interface except when configuring or troubleshooting issues. However after a couple years now the interface is very outdated and I was looking for something more modern.

I did upgrade one of my N5550’s to “ThecusOS7”, a beta version. It was able to install and it appeared to be functional however I was unable to create a RAID volume. Which means I could not use it for much of anything. Not to mention it was clunky and the older UI actually seemed to be more functional. It was clear that OS7 was just trying to mimic Synology’s DSM, but lacked all the polish. My attempts to downgrade were unsuccessful and I had pretty much bricked the NAS.

So now what? I have three N5550’s and don’t want the hardware to go to waste.

Continue reading…

NAS3 SSD Upgrade

This week NAS3 got a storage upgrade from 128GB SSD’s to 500GB SSDs. NAS3 is my SSD NAS which is used for hosting virtual machines.

NAS3 has been running with the 128GB SSD’s for many years now. In fact I paid more for the 128GB SSD than I did for the 500GB SSD. However that was exactly my reasoning for waiting so long to upgrade. NAS3 is not intended to be a performance beast since it’s limited to 1Gbps networking. It would literally be a waste to use high end SSDs in this machine.

Choosing an SSD is sometimes a difficult decision. You have to weigh the performance, cost, and endurance (quality) of the drive. Especially so in a NAS or RAID environment where SSD’s “total bytes written” or “TBW” endurance rating will become a factor.

I paid $90/each CDN for five Crucial MX500 500GB 3D NAND SATA 2.5 Inch Internal SSD – CT500MX500SSD1(Z).

I don’t like using a parity RAID with SSD’s because you will wear them out faster, but in this case I simply don’t care. I would rather have a little redundancy with the trade off of a faster wear rate. Considering the old 128GB SSD’s have been running in RAID5 for many years now as well, from my experience it’s not a big issue.

In RAID5 the disks give me 1.81 TB of usable SSD space. Compared to about 477 GB before. So big upgrade in comparison.

This upgrade should last a few years at least. The next storage upgrade for the SSD side will be getting rid of the ancient Thecus N5550’s and replacing them with a Synology NAS. But that’s a future wish-list.

Hope you enjoyed reading. If so please drop a like or share.

New Synology DS1817+ NAS & ISP Switch

By the end of 2017 nearly all my NAS servers were close to reaching full capacity. I had already pre-decided on getting a Synology DS1817+ but it was just a matter of when. I wanted something that was more than five bays and would be upgradable to 10G networking in the future. The DS1817+ seemed to match all of my needs and my budget. Continue reading…

Whoops! My Samsung 950 PRO M.2 512GB SSD experience

Samsung-950-Pro-SS

This story is a bit of a sad story. Mainly due to the failure of my own personal oversight over a very important specification requirement and snowballed by my online shopping addiction.

For a little back story – I had been reading great reviews all over the internet about Samsung’s new 950 PRO 512GB M.2 NVMe SSD drive having amazing benchmark speeds. This drive features cutting-edge V-NAND-based NVMe SSD supports PCI Express Gen 3 x4 lanes, providing a higher bandwidth and lower latency to process a massive amount more data than SATA SSDs. It outperforms SATA SSDs by over 4.5 times in sequential read and by over 2.5 times in sequential write, delivering the speeds of 2,500 MB/s read and 1,500 MB/s write respectively. I have never purchased or used a M.2 drive before, so this would be me venturing into a bit of an unknown territory.

I wanted to get my hands on one of these really badly! I knew my motherboard (Gigabyte X99 G1) had a M.2 slot so I checked the website to confirm and at a glance everything appeared to be right… So I pulled the trigger and purchased it. Patiently waited 2 weeks for it to arrive. Finally, I was able to install the drive after some frustration with BIOS settings and drivers. But something wasn’t right… I was concerned as to why I was getting a little under half of the speed other people were getting on their benchmarks. What gives?

Well… lets take a closer look at my mother board specifications again. It is the Gigabyte X99 G1:

000250_2016-01-22 09_17

See that..!? Notice the “PCIe x2/x1“? The Samsung 950 PRO 512GB is a PCIe 3.0 x4. So that means that on my motherboard the M.2 drive is operating at literally under half the bandwidth that it’s capable of running at. Only at this point, having the drive purchased and installed, did I realize that there is a major difference between “M.2”  and “Ultra M.2” which also known as PCIe 3.0 x4 which supports up to 32 Gb/s (4 GB/s) compared to PCIe 2.0 x2 which would only support 8 Gb/s (1 GB/s).

nooooooooo

That means for a M.2 drive using PCI-E 2.0 x2, it only has a 25% potential speed increase over SATA III. Not exactly what I was going for considering the $329 USD price I paid. This means for me to be able to use the drive at full speed I will need to find a motherboard with a LGA2011-v3 CPU socket and a Ultra M.2 socket. A harsh lesson to learn and a fix I will have to put off for some time. Luckily I may be able to just get a M.2 x4 to PCIe adapter to fix this problem.

In the end I can only laugh at myself as a technical professional to make a mistake like this – but hey this is my story and hopefully it may help you avoid making the same mistake. Check to ensure your motherboard’s M.2 interface version supports PCIe 3.0 x4  NVMe 1.1!


Update 1/28/2016:

Fixed! Thanks to the $30(CAD)  Addonics ADM2PX4 M2 PCIe SSD to PCIe 3.0 4 Lane Adapter.

2016-01-28 16_48_52

The Samsung Magician software is also showing that I am using all four lanes, instead of just two!

2016-01-28 17_02_32

Here’s a bonus benchmark of another Samsung drive I have with RAPID mode (RAM cache) enabled. :O
2016-01-28 16_42_33


Do you have a story to tell about your M.2 drive experences? Let me know in the comments below!

Storage Refresh 2016 – Time to Build! (Part 2)

IMG_0254

Part 1: http://www.vskilled.com/2015/07/storage-refresh-2016-the-plan/

The hard drives have arrived today from NCIX and it’s now time to build it out to finally increase the storage capacity in my home lab. I’ve made only minor changes to the original plan; I ended up shying away from the Seagate 8TB archive hard drives I had originally planned on buying to use strictly for backup purposes. Much like 3TB drives, I just don’t have any confidence in them long-term.

DeviceCurrent Drive LayoutCurrent CapacityDesired Drive LayoutDesired Capacity
NAS 1 (Thecus N5550)5 x 2TB (RAID 5)7.21TB5 x 4TB (RAID 5)16TB~
NAS 2 (Thecus N5550)1x4TB, 2x2TB, 1x1TB, 1x640GB (JBOD)8.9TB5 x 2TB (RAID 5)7.25TB~
VMH01 (Dell C1100)1 x 1TB1TB2 x 8TB, 2 x 2TB (JBOD)20TB~

The end result stays the same. I’m looking to end up with two large data/media storage pools with about 22TB of usable storage. A considerably large increase from my existing data capacity of 7.21TB.

The challenge now is performing a safe and successful data migration to the new storage. Normally I use NAS2 as my backup/archive NAS. I am going to remove the drives from it and move some of them into my VMH01 (Dell C1100) and create a temporary datastore to backup of all the data on there. That way I can safely create a backup of the data and still be semi-protected by RAID.

After some careful scavenging through some documentation I found that I would probably be able to swap the disks from NAS2 and move them into NAS1 without losing any configuration or data. However this is risky, so I will store a 3rd copy of my data on a JBOD  on “BackupSrv”. In this case the risk is worth the reward if it pays off because I will be saving myself from having to copy the data from the BackupSrv JBOD again, and worst case scenario I still have the data on the drives so I can just swap then back if I needed to roll-back the change.

The Step-by-Step Action Plan:

  1. NAS2: Destroy JBOD, power-off, remove drives
  2. VMH01: Add 1x4TB, 1x2TB, 1x1TB. (Add to BackupSrv VM)
  3. BackupSrv: Create JBOD datastore for backup
  4. NAS2: Add 5x4TB NAS drives, build raid, re-configure NFS, rsync, ftp, etc
  5. NAS1: Full rsync backup to BackupSrv & NAS2, verify data
  6. Power-off both NAS1 and NAS2.
  7. Swap disks from NAS2 into NAS1, NAS1 into NAS2. Power on, cross fingers.
  8. Verify data and shares. It works!
  9. Data Migration Completed
  10. Cleanup: Reconfigure Rsync Backup Schedules
  11. Cleanup: Update Home Lab page, CMDB, Wiki
  12. Cleanup: Permissions on shares

* – Veeam Backup Repository moved temporarily to NAS1 (approx 600GB~)
* – NFS datastores + permissions will be lost during a RAID rebuild
* – Printer Scan-to-FTP Setup


Lets take a look at our storage now:

000204_2015-11-09 08_47


Excellent. Now I have a large RAID5 14.5TB share for media/data storage, another RAID5 7.26TB share for more data storage, and another 7TB of disks in JBOD for archive/backups. I have a LSI MegaRaid MR SAS 9260-8i 8 Port SAS Raid Card on the way to properly archive/backup JBOD the drives so that I can present the disks more cleanly to a backup VM.

Storage Refresh 2016 – The Plan

homelab-bottom

The time has come to increase storage capacity in the home lab. I expect that before the end of this year that I will have less than 1TB of free space left on my primary data NAS. That is a problem, and an expensive one at that. At the time of this writing I have 1.66TB of 7.21TB free (77% used). My data growth rate is currently between 3-5% on average per month. That gives me about 2-3 months before I’m in a critical state.

Adding storage to the primary data/media pools means also means adding storage to the backup pools. You won’t catch me without a backup – you only need to be burned by that once before you learn that harsh lesson. Seagate has come out with a 8TB drive meant for backups only which will help with backup capacity. Overall have been pretty skeptical of these 8TB drives. It is strongly advised not to use them in a RAID setup, they use SMR (shingled magnetic recording) that allows the tracks on the platter to be layered on top of each other to increase platter density or tracks per inch (TPI). With that said they seem to be fairly robust. While one could argue that I could (should?) delete some stuff, I strongly disagree. I am a data hoarder. Do you literally throw out all your books after you’re done reading them? Probably not. Same goes with data.

Upgrading the primary NAS means I’ll need to rebuild RAID arrays, use NAS 2 as “swing” storage, move data onto the upgraded NAS 1, rebuild NAS 2, and so on. This will take a couple of days of just moving data around and ensuring I have a backup at all times. During the swing process I am particularly vulnerable to drive failure. Currently my backup NAS 2 is in a JBOD configuration. If any one of the drives fail during this read/write intensive transfer process – game over. For that reason I will be making a second backup onto the 8TB seagate drive, just in case.

The plan is to switch NAS 1 into 5 x 4TB RAID 5, NAS 2 into what NAS 1 is currently (5 x 2TB RAID 5). I’ll then be leveraging my VMH01 (Dell C1100) for the backup pool drives (2 x 8TB, 2 x 2TB in JBOD) served up by a NAS4Free virtual machine. To help wrap my head around what I am doing I like to draw things out on my whiteboard. Here is my “draft” design. Apologies for the chicken scratch.

storagerefresh2016-draft

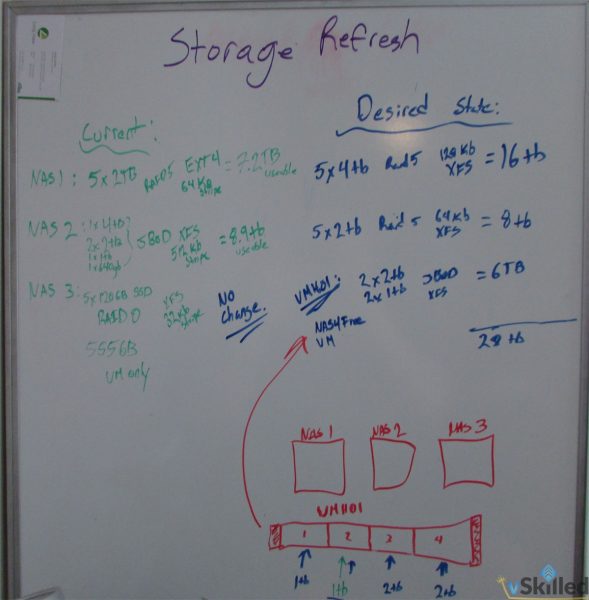
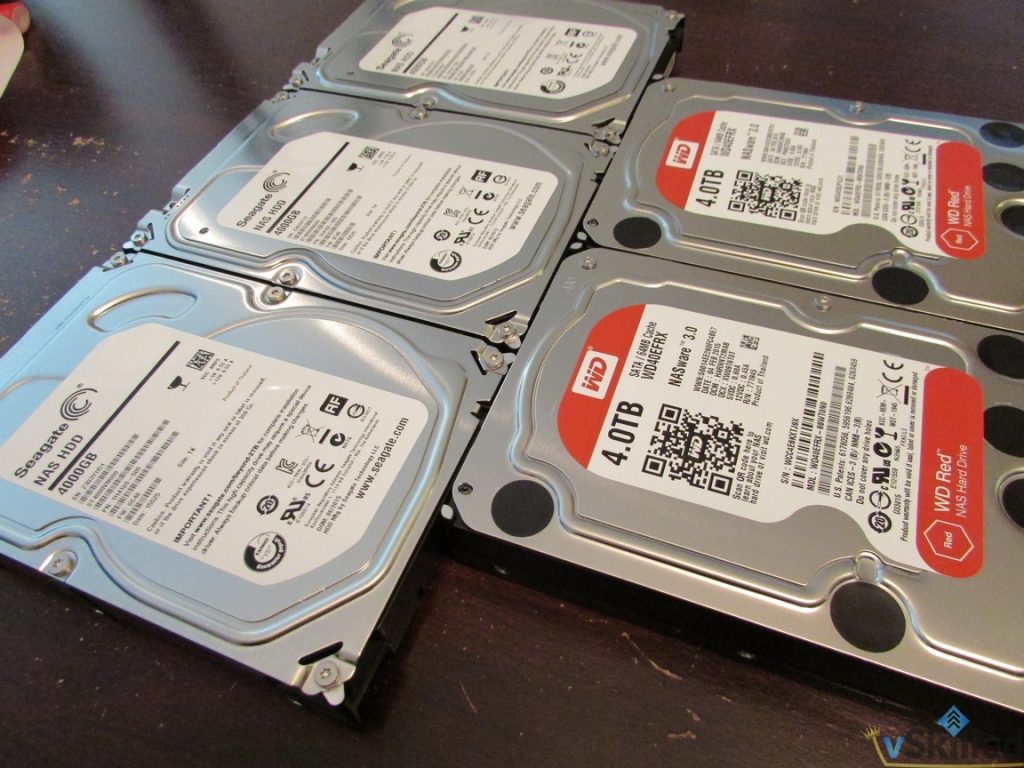
I’ll be re-purposing an existing 4TB drive in NAS 2 and moving it into the NAS 1 raid pool (hence why only purchasing 4 x 4TB drives as seen below). This saves me the cost of buying another 4TB drive.

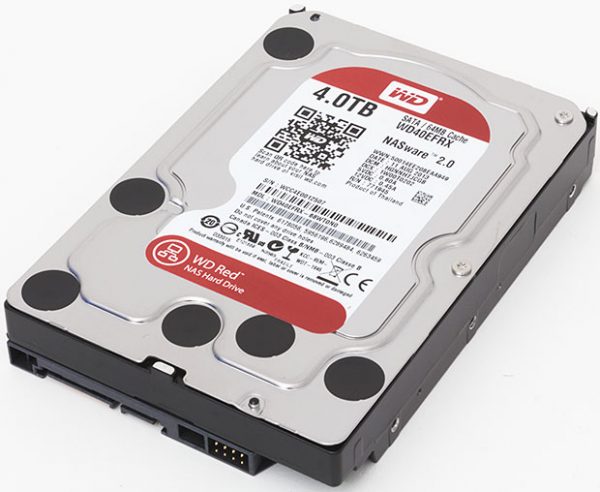
I will be using a multi-vendor setup using a mix of Seagate and Western Digital drives. That will make things a little more robust in the long term. Currently I just have desktop rated drives in the primary NAS which, by manufacture guidelines, are only rated for a maximum of 2 in RAID 1/0 and they are also only rated for 8×5 use. The WD Red and Seagate NAS series drives are designed for use in home NAS and servers. They offer a good price to performance ratio, and possess a few features which make them more suitable for RAID arrays such as TLER, higher vibration tolerance (which should result in a longer lifespan), consume less power and are rated for 24/7 use.

western-digital-red-4tb

DriveQuantityCost (CAD)
Seagate ST8000AS0002 8TB 5900RPM 128MB Cache SATA3 Archive Hard Drive OEM - for Backup Data Only2 x $319.99 ea$319.99
Western Digital WD WD40EFRX 4TB Red SATA3 6GB/S Cache 64MB 3.5in Hard Drive2 x $209.99 ea$419.98
Seagate ST4000VN000 4TB 64MB SATA 6GB/S 3.5IN Internal NAS Hard Drive2 x $199.99 ea$399.98
$1,459.94

All said and done I will end up with two large data/media storage pools with 22TB~ of usable combined storage.

A considerably large increase from my existing data capacity of only 7.21TB. The idea being for this to last at least 3+ years. NAS 2 which is currently a JBOD for backups only will now be another usable RAID5 protected data pool. Each NAS backed up to VMH01’s backup storage JBOD.

DeviceCurrent Drive LayoutCurrent CapacityDesired Drive LayoutDesired Capacity
NAS 1 (Thecus N5550)5 x 2TB (RAID 5)7.21TB5 x 4TB (RAID 5)16TB~
NAS 2 (Thecus N5550)1x4TB, 2x2TB, 1x1TB, 1x640GB (JBOD)8.9TB5 x 2TB (RAID 5)7.25TB~
VMH01 (Dell C1100)1 x 1TB1TB2 x 8TB, 2 x 2TB (JBOD)20TB~

I’ll be sure to post updates with pictures on the build and upgrade process when the time comes. For now I’ll be trying to saving up some cash to make this plan come together.