Enable SNMP on ESXi 5.5

000174_2015-07-30 11_27

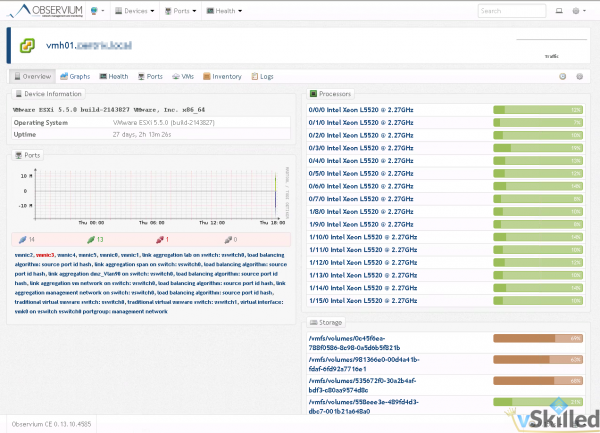
This is a quick guide on how to configure ESXi 5.5 hosts for SNMP monitoring. I use Observium to monitor and collect information about devices on my home network that support SNMP. This allows me to have an in-depth look at devices on my network as well as see metrics that go far into the past.

First we need to SSH to the ESXi host you would like to enable SNMP on. To do that we first need to make sure that SSH is enabled on the host.

Ensure that SSH is enabled on the ESXi Host:

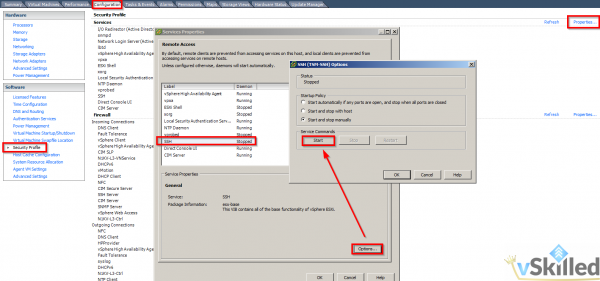
  1. Go to the configuration tab, then select Security Profile
  2. Select Properties with Services, then select SSH Server
  3. Click the Start button once to start the service for now

000175_2015-07-30 11_33

Using an SSH client, such as Putty, connect to your ESXi host. Then run the following commands:

esxcli system snmp set -c public
esxcli system snmp set -l warning
esxcli system snmp set -e yes

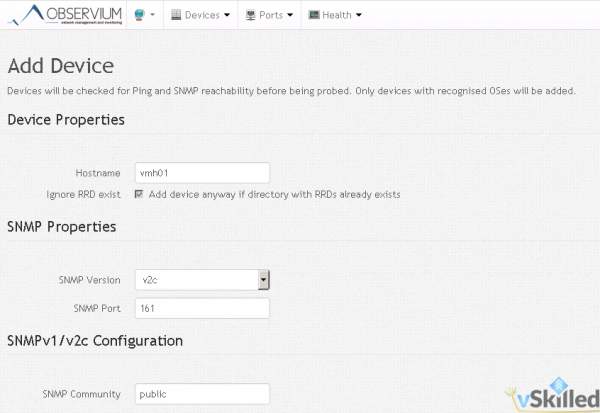
That’s it! You can change the “public” string to whatever your preferred community name is. Now you can disable SSH on the host if you prefer. Then add the host into your SNMP monitoring tool. Wait 5-10 minutes for discovery and your finished.
000173_2015-07-30 11_26

VMUG “Green Out” T-Shirt Design Contest

Today VMUG has announced a new contest to design the new look of the VMUG T-Shirt. If you are the artistic type I would suggest that you give this a go. I am excited to see what people can come up with. They are asking for VMUG members to submit a design or phrase that demonstrates the value of VMUG to you as a member and a VMware customer. Not many other details were provided.

Eligibility: Must be a VMUG member

Deadline: Must submit your entry to [email protected] by 5:00 pm Thursday, June 19th CST
Note: The shirt will include a front graphic only and will be printed in one color. You can download the VMUG logo here.

Copy of the email:
(Click to Enlarge)

000043_2014-06-05 09_30

End of General Support for vSphere 4.x

This is just a friendly heads up for anyone who may still have VMware vSphere 4.x (ESX, ESXi, and vCenter 4.x) in their environment.

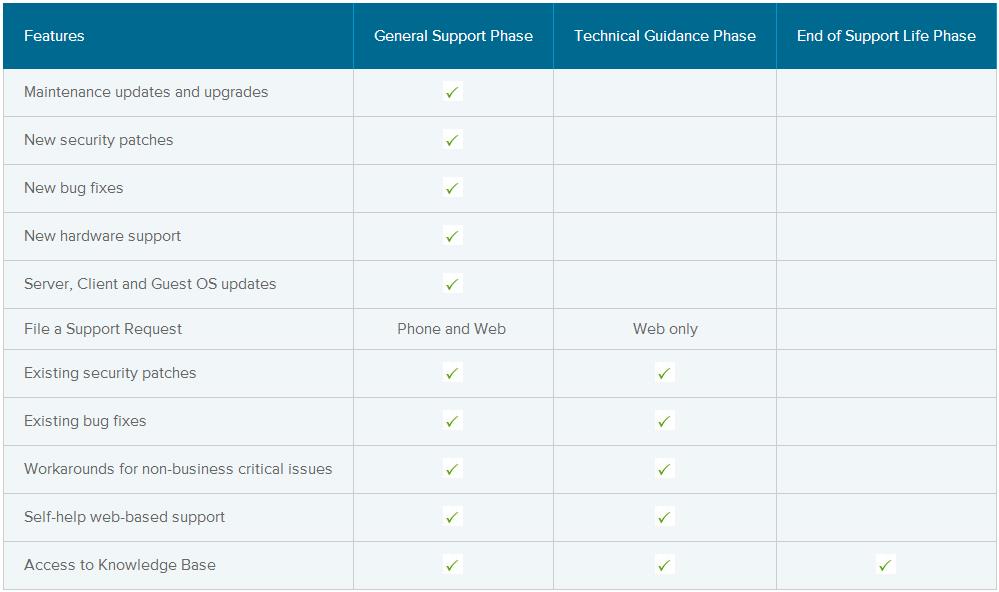
We have quickly approached the end of vSphere 4.x General Support phase on May 21st, 2014. This means that there will be no more maintenance updates / upgrades, security patches, bug fixes, new hardware support, or server / client / guest OS updates. This support is only provided during the General Support Phase which begins on the date of general availability of a Major Release (“GA”) and lasts for a fixed duration (typically 5 years).

Support will still be available through the 2-year Technical Guidance Phase but it’s limited to providing existing security patches, bug fixes, and workarounds for non-business critical issues. Be aware that there is no phone support for a product that has reached the Technical Guidance phase of its lifecycle.

vmware4EOL

SSD Emulated Virtual Disks for Nested ESXi

I came across a gotcha scenario when trying to deploy vSAN in my home lab. When adding disks to the nested ESXi server all of the disks are detected as regular ol’ spindle disks regardless of the actual underlying storage. So I was in need of a method to emulate an SSD device. Truth be told there are actually many other reasons why you might want to emulate a SSD disk.

The solution is easy! It’s just one simple edit to the virtual machine’s configuration file (VMX). As long as you’re running virtual machine hardware version 8 or later you can configure a specific virtual disk to appear as an SSD.

scsiX:Y.virtualSSD = 1

X represents the controller ID and Y is the disk ID of the virtual disk.