Enable SNMP on ESXi 5.5

000174_2015-07-30 11_27

This is a quick guide on how to configure ESXi 5.5 hosts for SNMP monitoring. I use Observium to monitor and collect information about devices on my home network that support SNMP. This allows me to have an in-depth look at devices on my network as well as see metrics that go far into the past.

First we need to SSH to the ESXi host you would like to enable SNMP on. To do that we first need to make sure that SSH is enabled on the host.

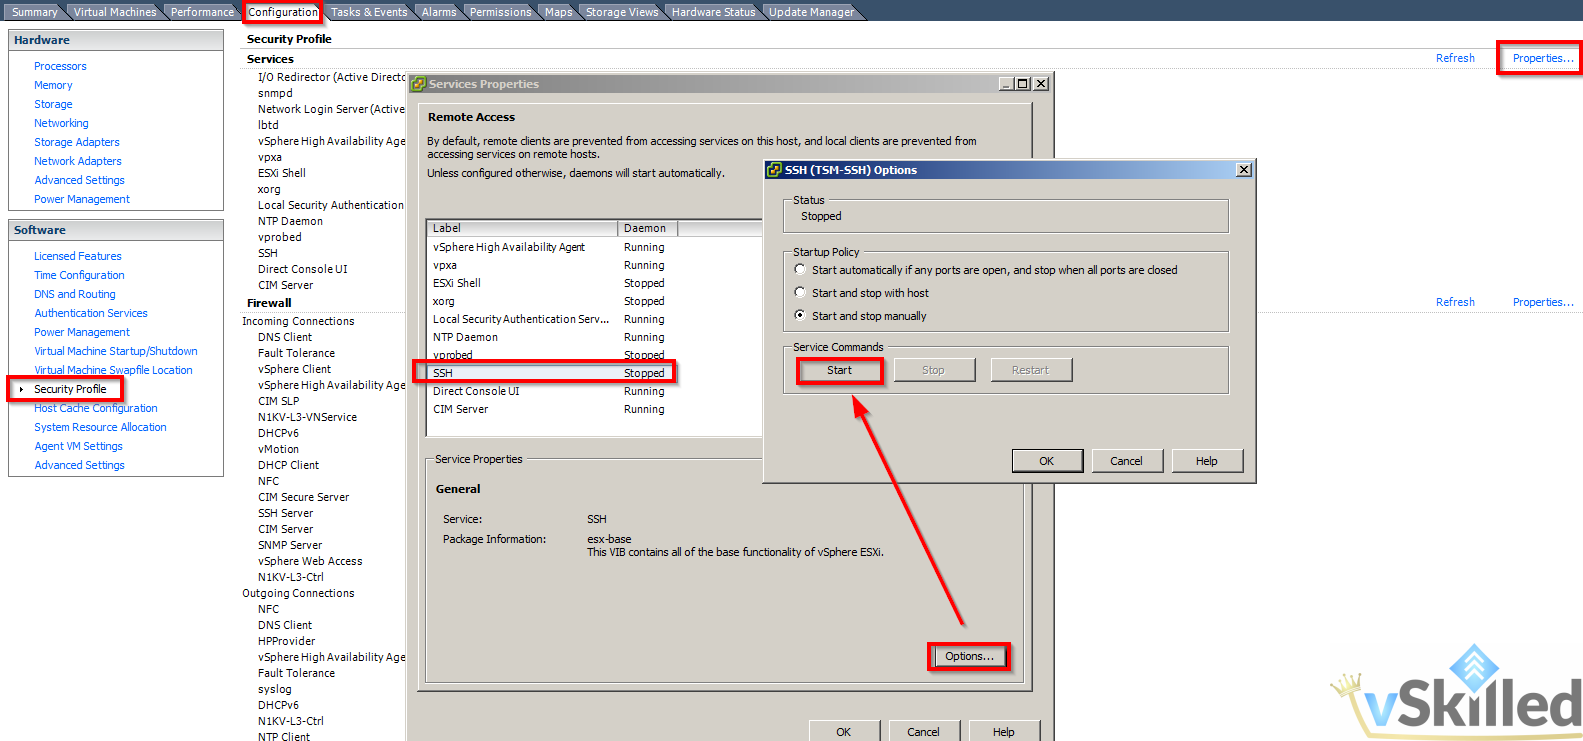
Ensure that SSH is enabled on the ESXi Host:

  1. Go to the configuration tab, then select Security Profile
  2. Select Properties with Services, then select SSH Server
  3. Click the Start button once to start the service for now

000175_2015-07-30 11_33

Using an SSH client, such as Putty, connect to your ESXi host. Then run the following commands:

esxcli system snmp set -c public
esxcli system snmp set -l warning
esxcli system snmp set -e yes

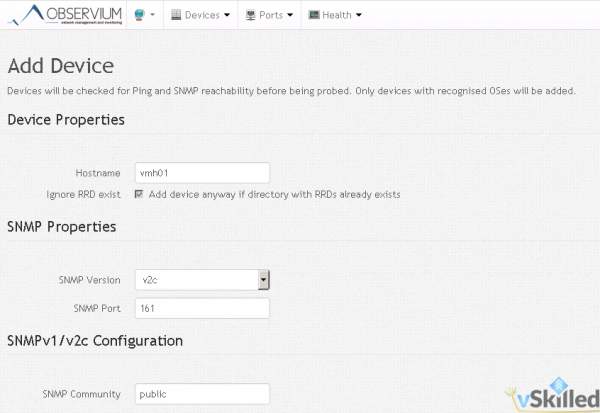
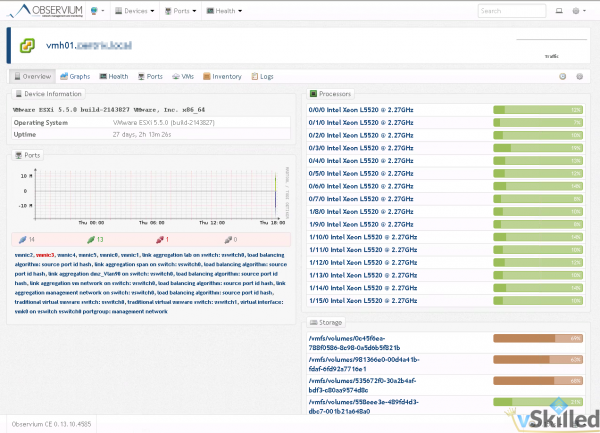
That’s it! You can change the “public” string to whatever your preferred community name is. Now you can disable SSH on the host if you prefer. Then add the host into your SNMP monitoring tool. Wait 5-10 minutes for discovery and your finished.

000173_2015-07-30 11_26

Change SSH Port in CentOS – Linux

This is just a quick guide on how to change the SSH port in CentOS. While there are many ways to make sure your server is as secure as possible there are some basic steps and measures that you can take to cover your bases.

By default SSH runs over port 22, this is well known and because of this it can be used for malicious reasons to try and access a websites core files or your Linux Servers. As part of improving security to a site you should make sure that you change the default port to something else. Here we will change the port in Centos 6.5 ( although this is for all flavors of Linux ) via command line and also change the SSH port via Webmin.

Change The SSH Port Number in CentOS

First log in to your VPS or CentOS Server and browse to the following path.

/etc/ssh/

Once there you will see a file named SSHD_Config, this is the file we will need to edit. This file is the main config file for SSH.  I use VI to edit text files on Linux, but you can use your tool of choice.

vi sshd_config

Locate the line that specifies the port. If your sshd_config file has not been altered the Port setting will be commented out with a # symbol (example below).

000040_2014-06-04 12_47

The # symbol tells the server to ignore anything after it on the same line, so we will need to remove that character and then change the number 22 to something else. Be sure you do not pick a port number that is in use by a different service.

Remove the # symbol and change the port number as desired:

000041_2014-06-04 12_50

Save your changes and close the sshd_config file. If you are using a firewall also make sure you open this port and disable port 22.

To apply the changes simply restart the SSH service and your finished!

service restart sshd

Next time you want to SSH to your server just use the port you specified in your config file and away you go!