Installing open-vm-tools on CentOS

Centos-Logo

Just a quick post here today. This is in regards to installing open-vm-tools on CentOS. There’s no need to download and install separate epel-release files anymore as it’s now in the CentOS extras repo directly.

To install them, just use this command, then install open-vm-tools.

yum -y –enablerepo=extras install epel-release

– extras is enabled by default but the –enablerepo caters for those that have disabled it.

Enjoy!

CentOS nightly auto updates using yum-cron

CentOS

It seems like new security vulnerabilities comes out at least once per month now a days. Keeping your systems up to date is the easiest way to keep these threats at bay as well as overall system stability. You can do nightly YUM updates automatically with email notifications via a package called yum-cron. This is a simple and easy solution to keeping servers up to date without using a centralized patching solution (such as Spacewalk).

Step 1 –  Install the yum-cron package and setup email notifications:

yum -y install yum-cron
chkconfig yum-cron on

Then edit /etc/sysconfig/yum-cron (CentOS 6) to set MAILTO= email address or /etc/yum/yum-cron.conf (CentOS 7) to set email_to= for email notifications. If you don’t need email notifications you can skip this part.

For CentOS 6:

[email protected]

For CentOS 7:

[email protected]

Step 2 – Start the yum-cron service…

service yum-cron start

Step 3 – Verifying yum-cron is working

Check that the service is running.

service yum-cron status

You can check your cron log at /var/log/cron to see if it ran using the following command.

cat /var/log/cron | grep yum.cron

You can also check the yum.log when it does notify of updates by email.

cat /var/log/yum.log


Change SSH Port in CentOS – Linux

This is just a quick guide on how to change the SSH port in CentOS. While there are many ways to make sure your server is as secure as possible there are some basic steps and measures that you can take to cover your bases.

By default SSH runs over port 22, this is well known and because of this it can be used for malicious reasons to try and access a websites core files or your Linux Servers. As part of improving security to a site you should make sure that you change the default port to something else. Here we will change the port in Centos 6.5 ( although this is for all flavors of Linux ) via command line and also change the SSH port via Webmin.

Change The SSH Port Number in CentOS

First log in to your VPS or CentOS Server and browse to the following path.

/etc/ssh/

Once there you will see a file named SSHD_Config, this is the file we will need to edit. This file is the main config file for SSH.  I use VI to edit text files on Linux, but you can use your tool of choice.

vi sshd_config

Locate the line that specifies the port. If your sshd_config file has not been altered the Port setting will be commented out with a # symbol (example below).

000040_2014-06-04 12_47

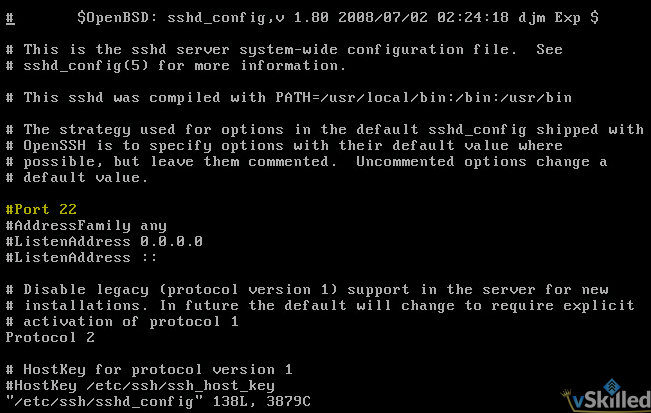
The # symbol tells the server to ignore anything after it on the same line, so we will need to remove that character and then change the number 22 to something else. Be sure you do not pick a port number that is in use by a different service.

Remove the # symbol and change the port number as desired:

000041_2014-06-04 12_50

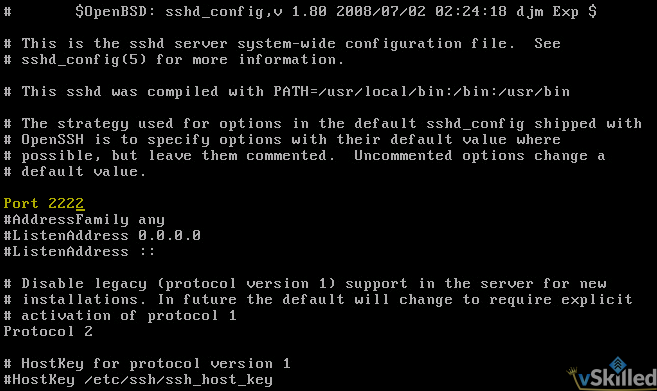
Save your changes and close the sshd_config file. If you are using a firewall also make sure you open this port and disable port 22.

To apply the changes simply restart the SSH service and your finished!

service restart sshd

Next time you want to SSH to your server just use the port you specified in your config file and away you go!